
How to setup NextJS to work with Contentful

A step by step guide for setting up a clean NextJS project to work with Contentful.
Please note that NextJS has an out of the box solution that functions with Contentful.
The solution laid out in this tutorial is aimed at those looking to add Contentful to an existing NextJS project.
This solution can be found on our Open Source Starter project on the branch tutorial/contentful/setup.
Please note that this solution does not include how we created the types or the additional helpers.
Step One: Setup Contentful
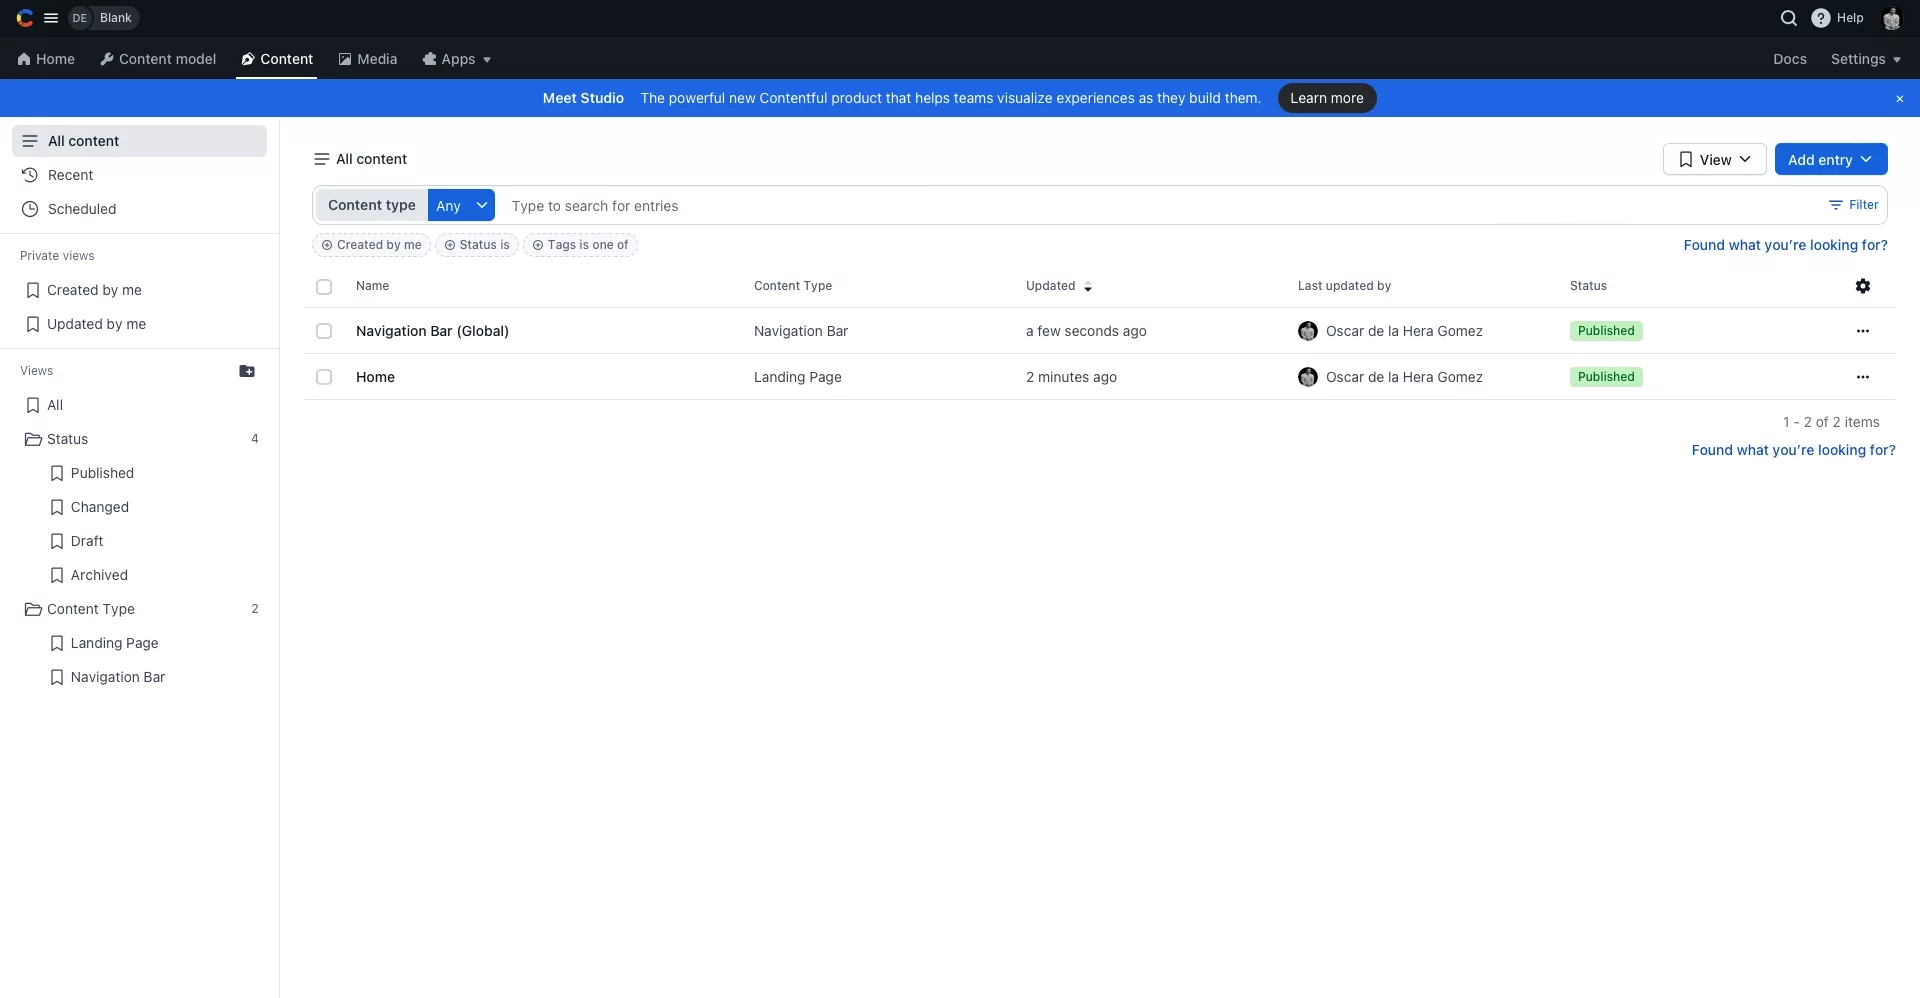
Create or login to Contentful, setup the content model and create some content.
Step Two: Install Contentful
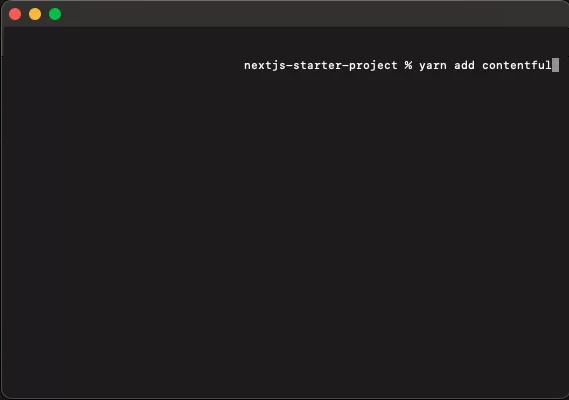
In Terminal, set the root directory to that of the NextJS project and then run the line below to install Contentful.
yarn add contentful
Step Three: Gather the API Keys
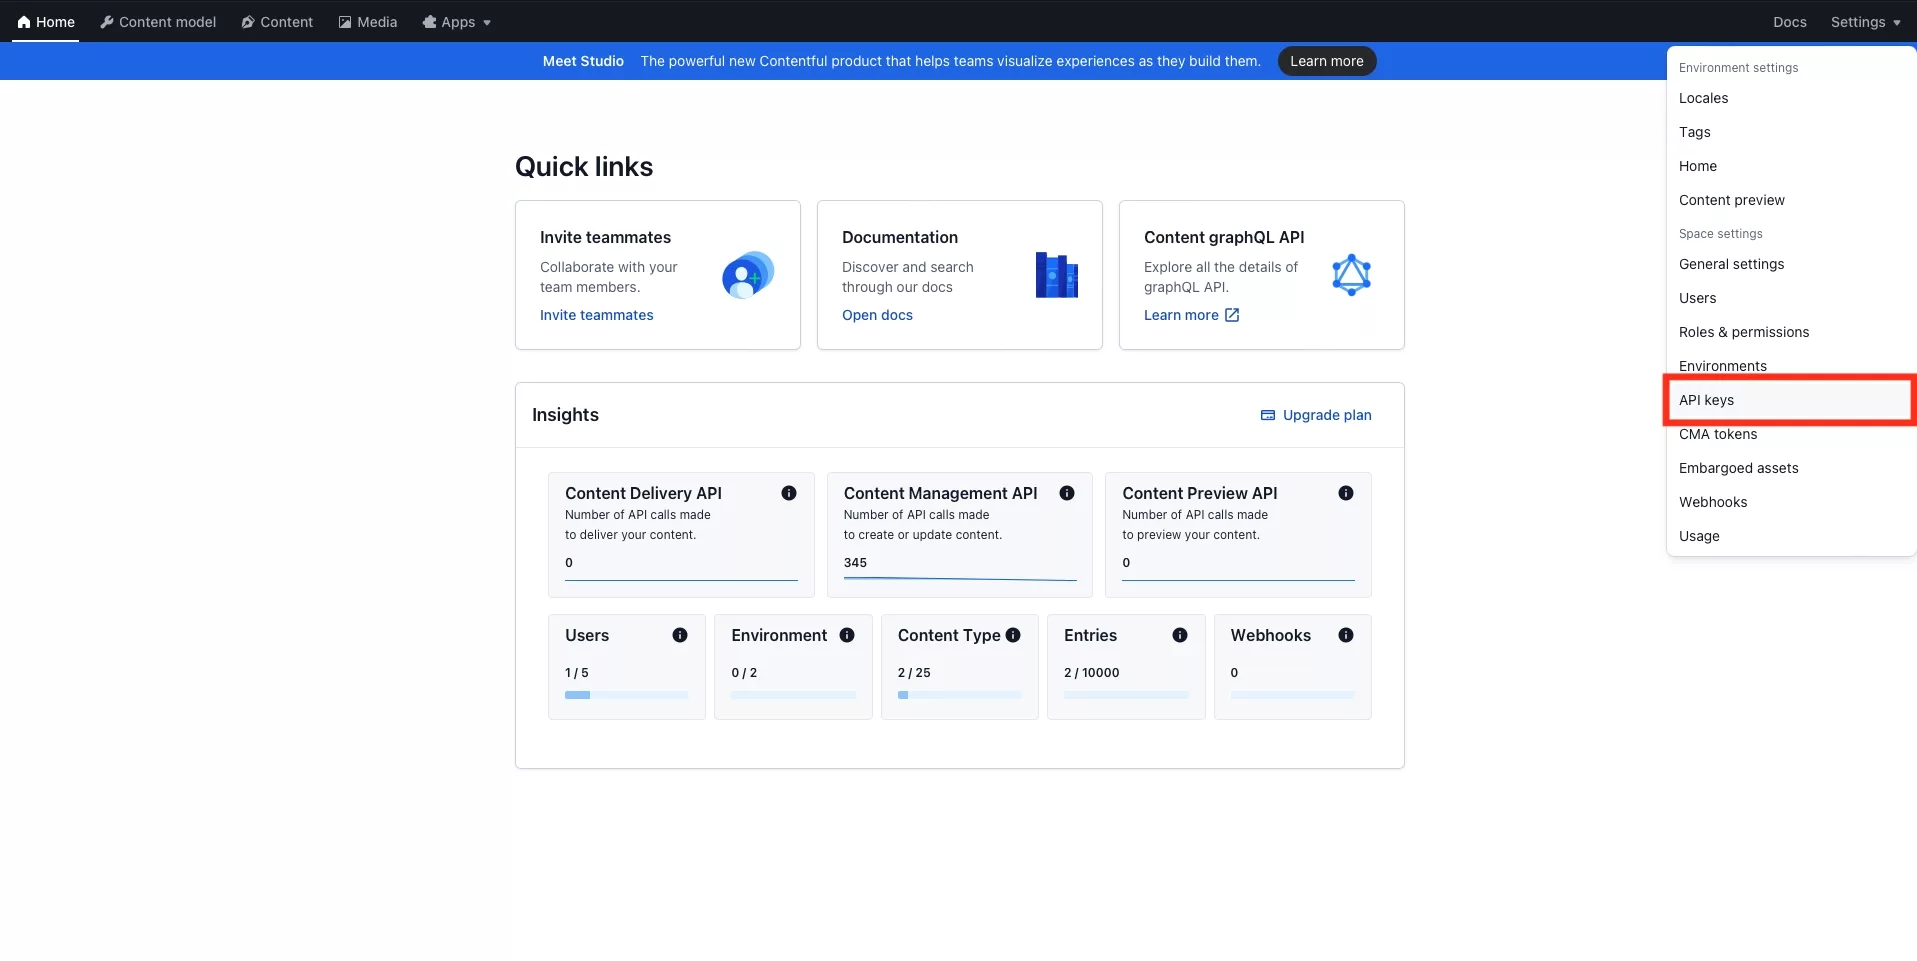
In Contentful, go to Settings > API Keys.
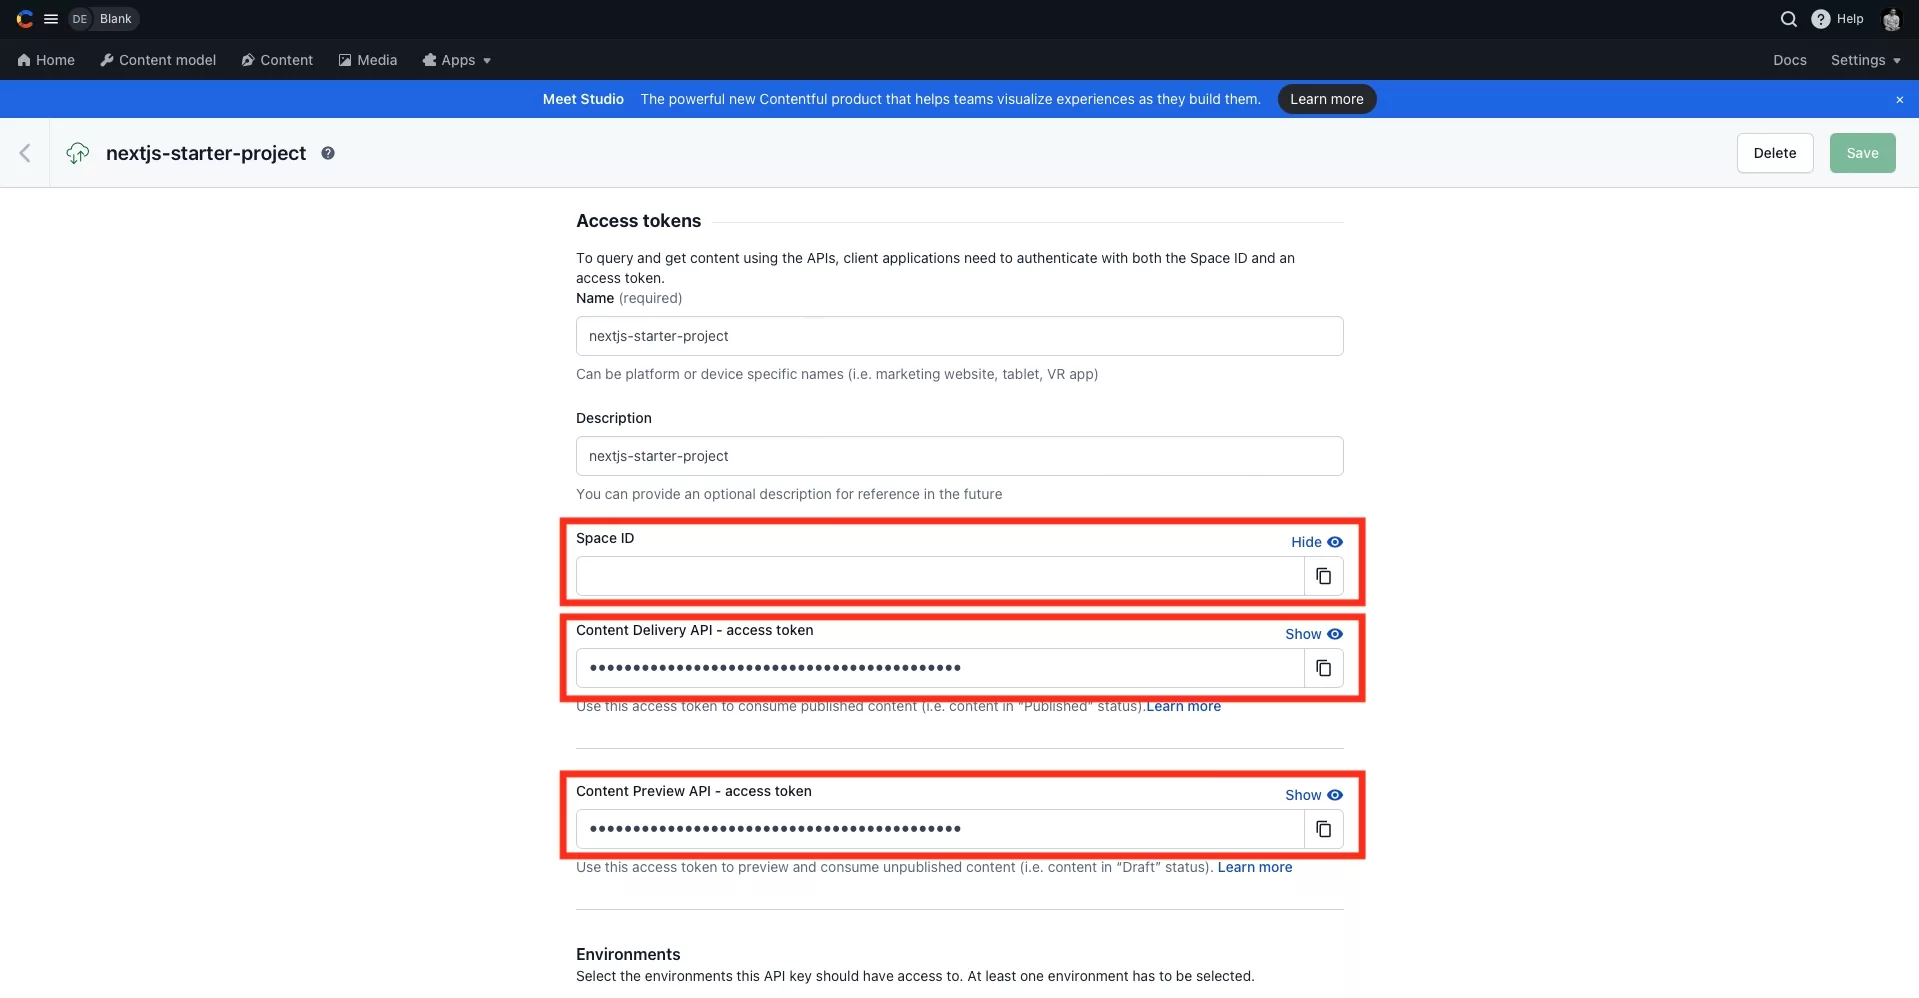
Within the API Keys, select an API Key and take a note of the:
- SpaceId.
- Content Delivery API - access token.
- Content Preview API - access token.
Step Four: Create the Environment Variables
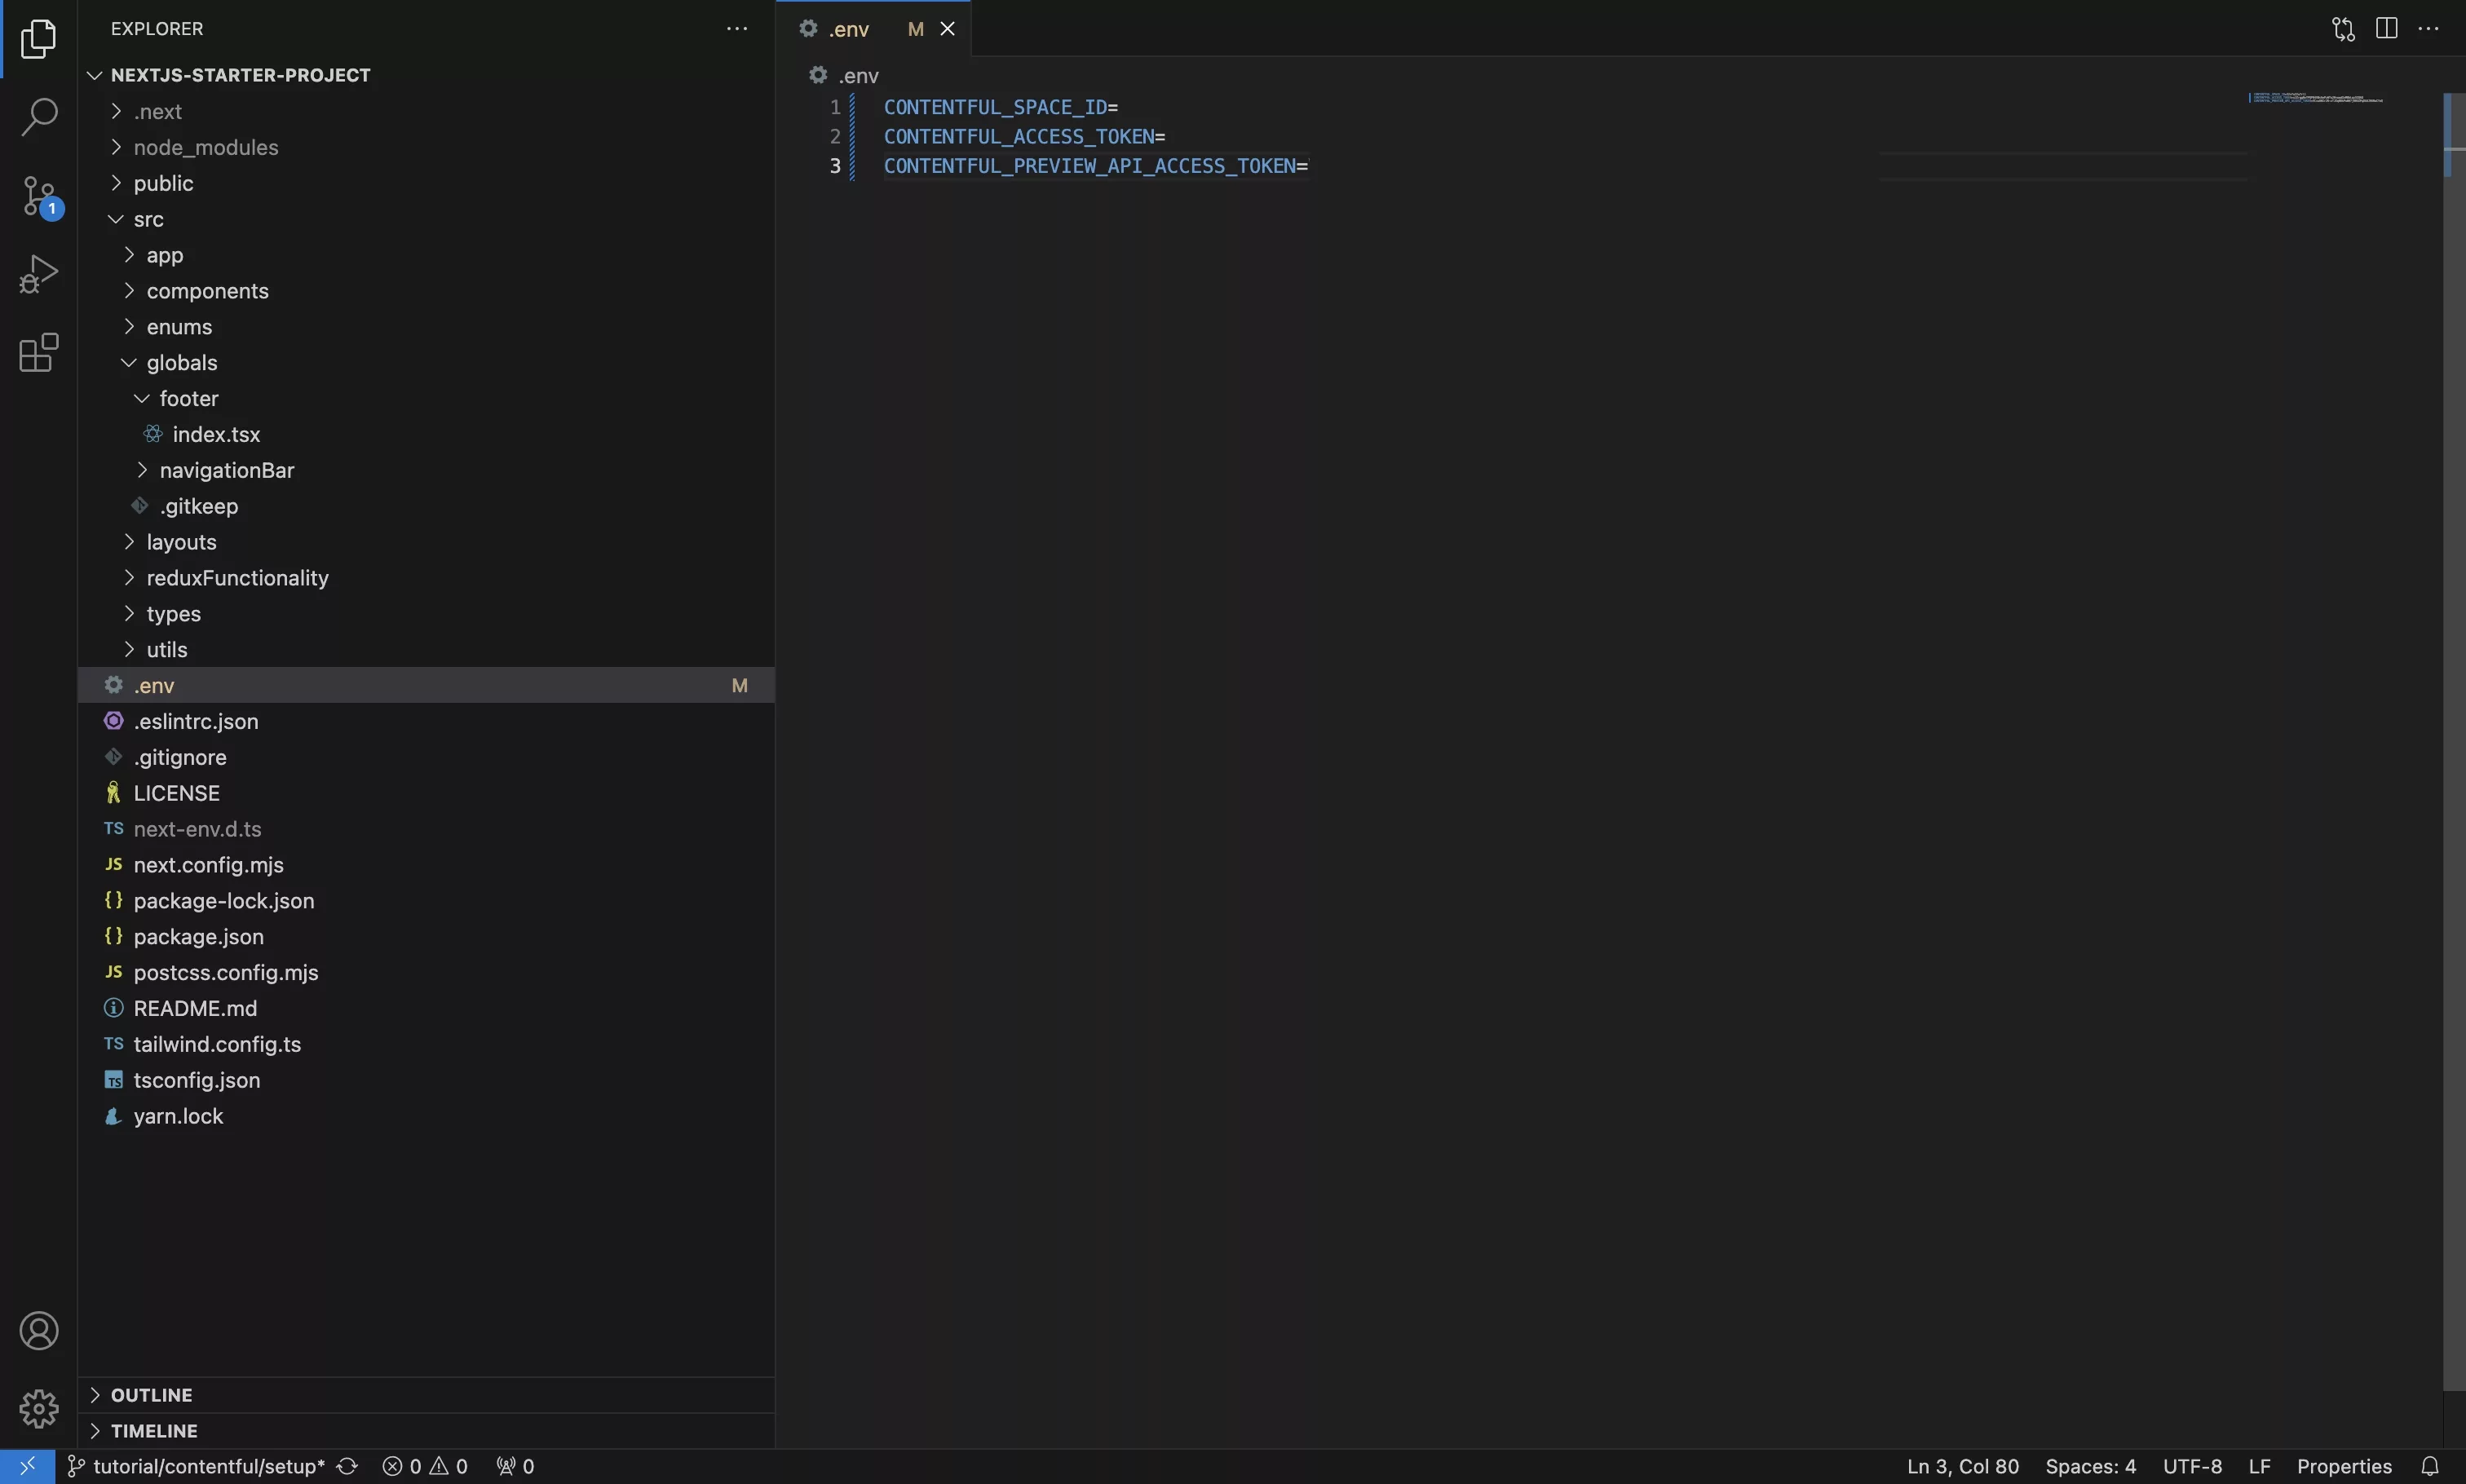
In the NextJS project, create an environment variable for each of the following:
- CONTENTFUL_SPACE_ID for the SpaceId.
- CONTENTFUL_ACCESS_TOKEN for the Content Delivery API - access token.
- CONTENTFUL_PREVIEW_API_ACCESS_TOKEN for the Content Preview API - access token.
Step Five: Create the Contentful Client
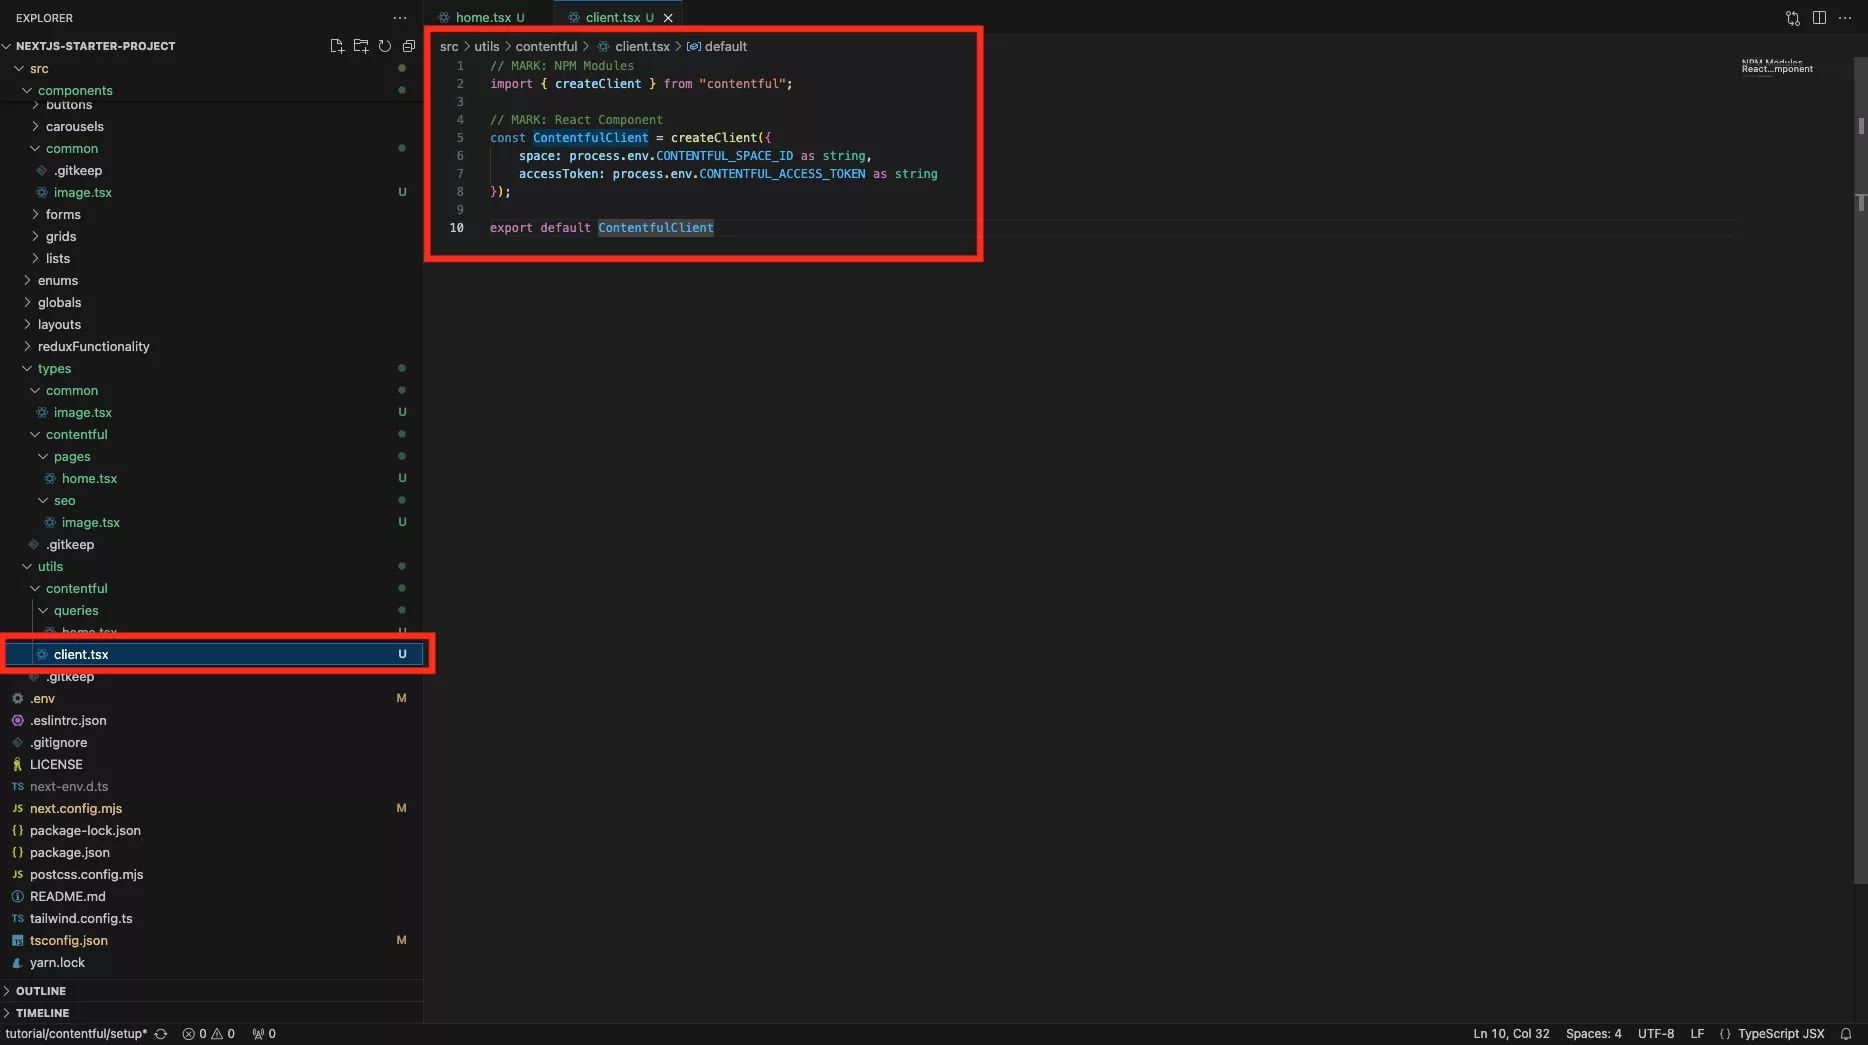
In the NextJS project, create a new file and add code similar to the one below to create the Contentful client.
Please note that we suggest that you place this file under utils > contentful.
Step Six: Setup the first Query
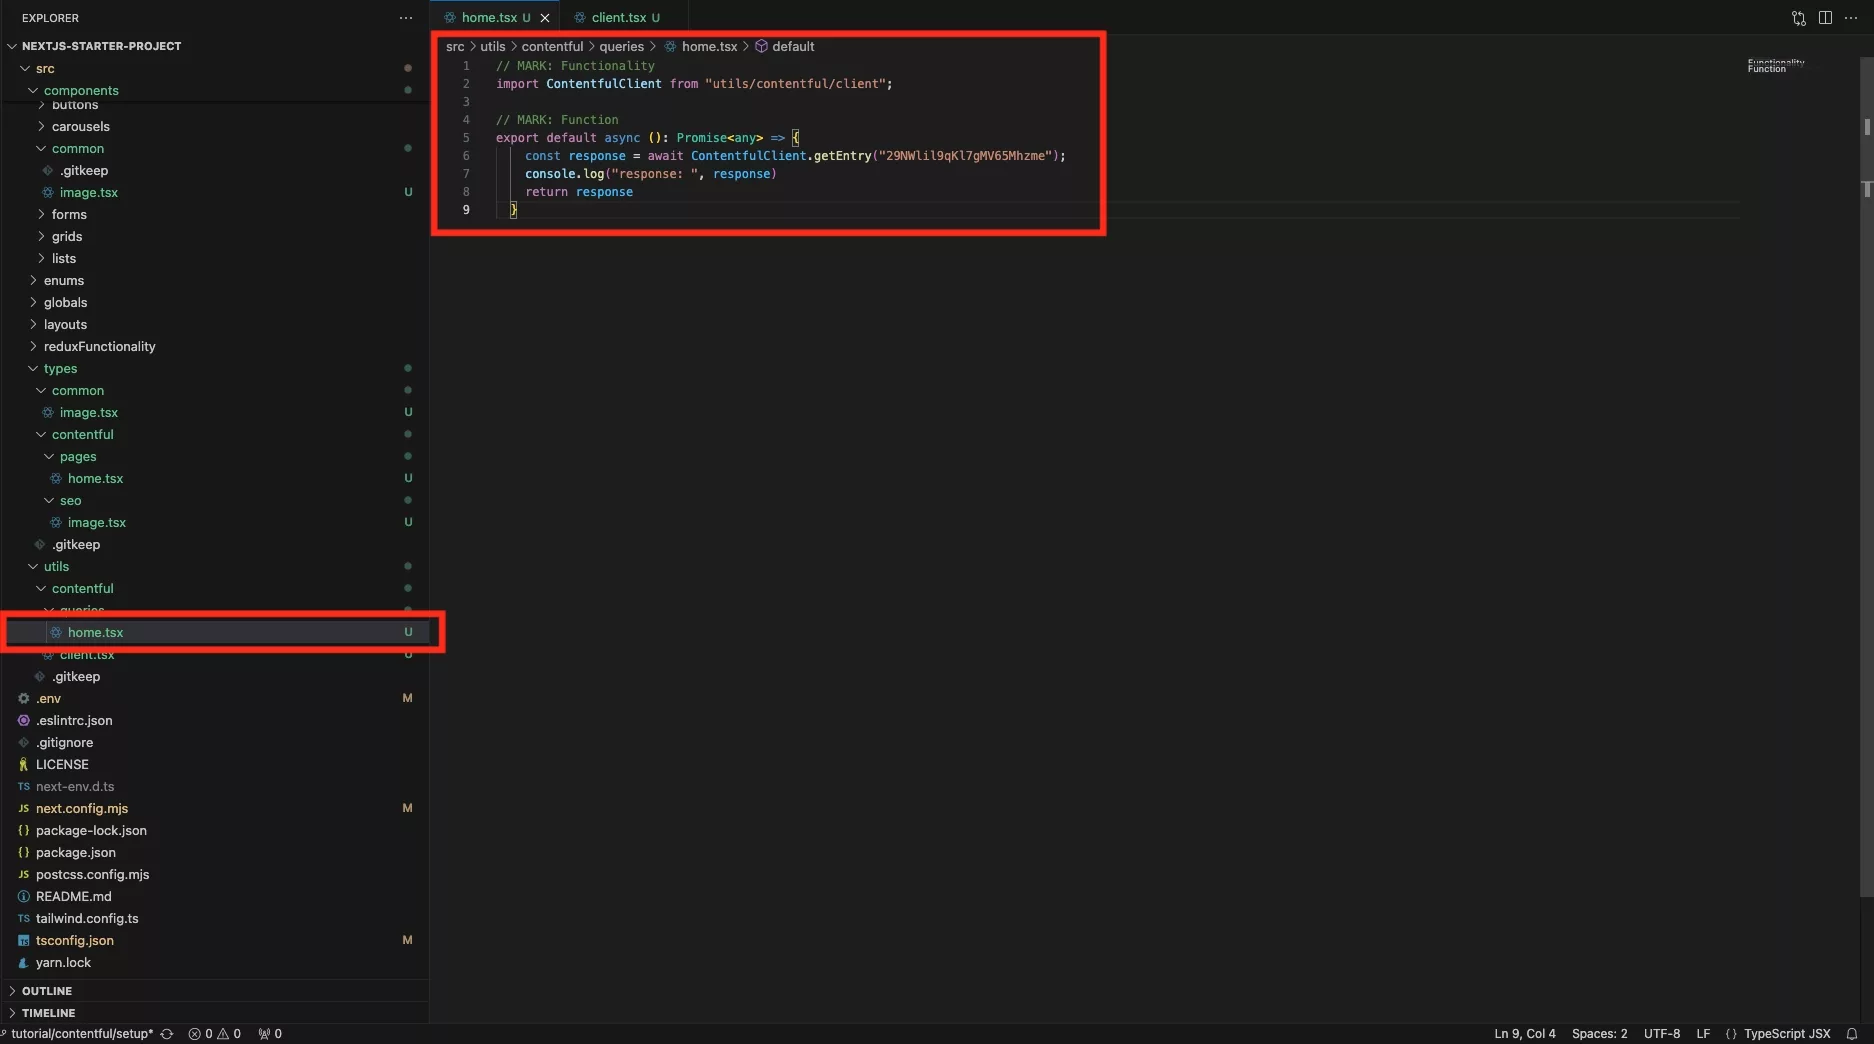
In the NextJS project, create a new file and write your first query. An example is found below.
Please note that we suggest that you place this file under utils > contentful > queries.
Step Seven: Update the page
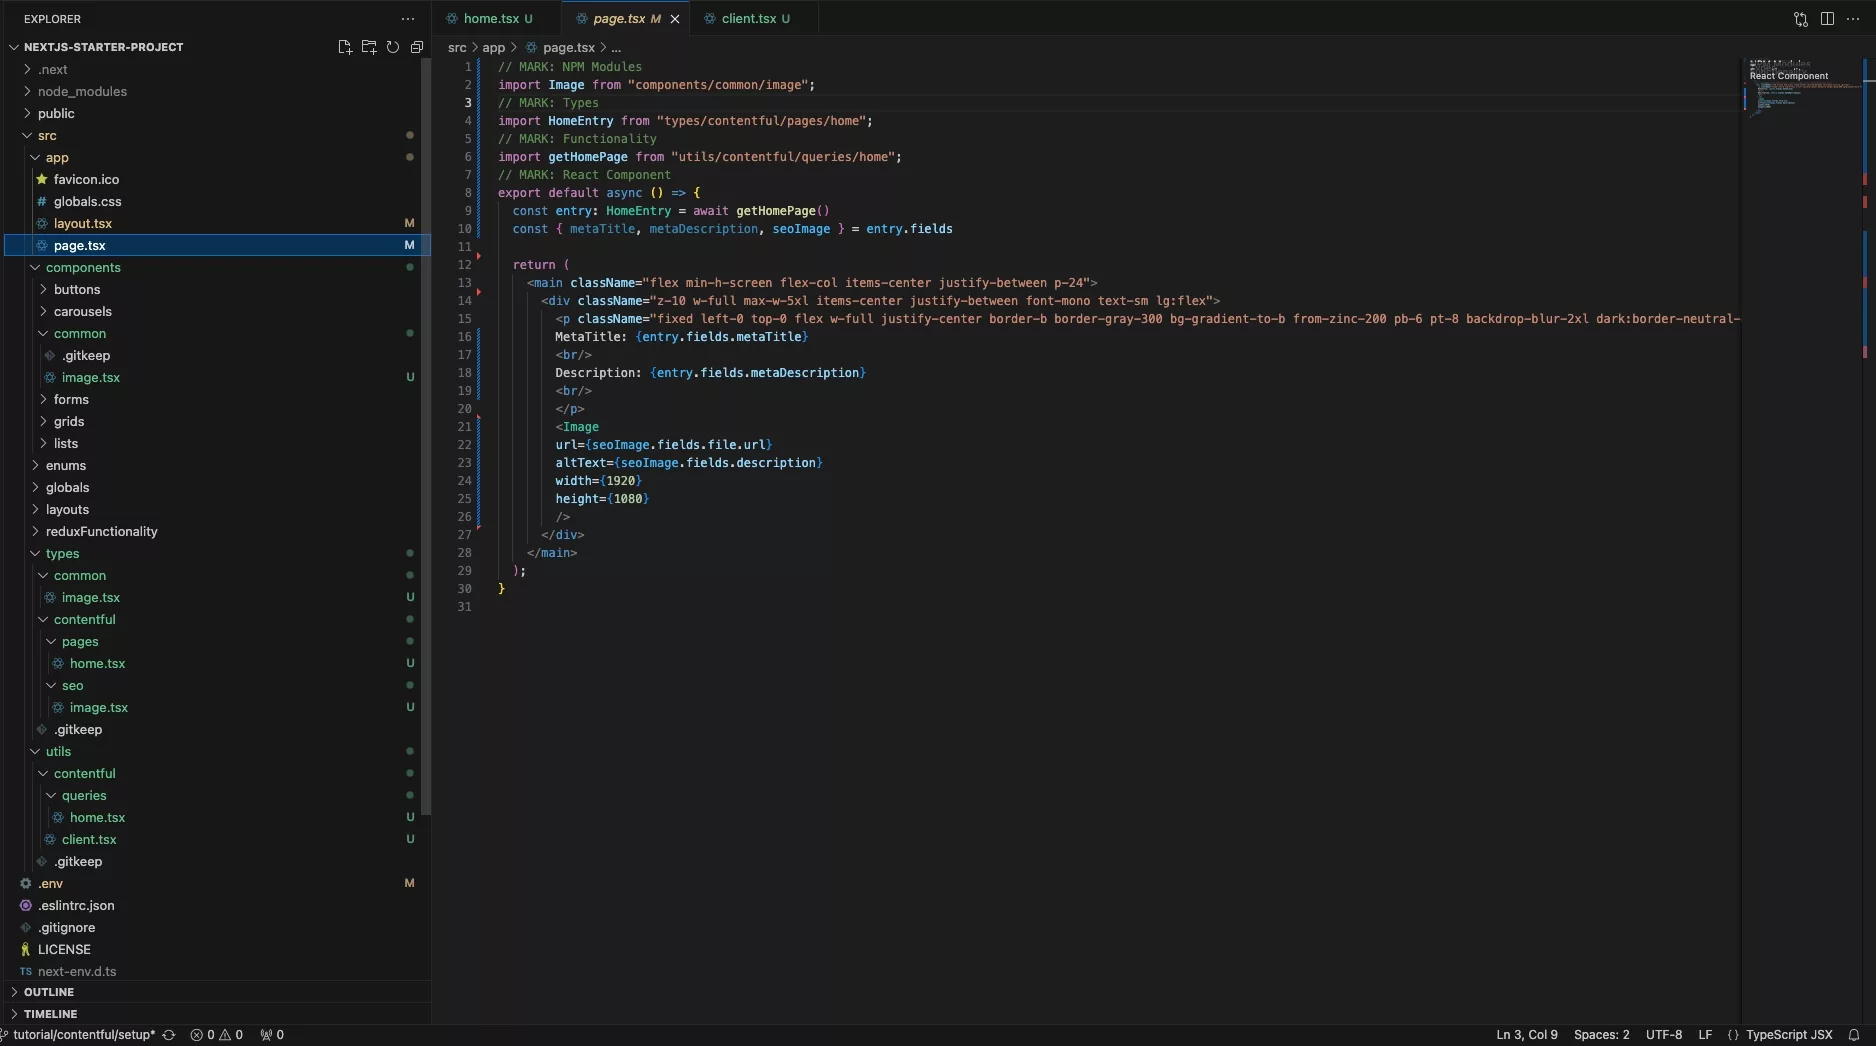
On the NextJS page (i.e. home page), update the file to make a request for the data, using code similar to the one found below.
Please note that you cannot use getStaticProps within a NextJS app page. Instead, you must create a "lib" or "utils" function that handles the request for you.
Step Eight: Test

Run the app and confirm that the data is being fetched correctly.
Having issues loading hosted images?
If you are running into issues loading hosted images, consult the guide linked below.
Looking to learn more about NextJS, ReactJS or web development?
Search our blog to find educational content on NextJS, ReactJS and web development.